GE V3SL Installation Guide

Browse online or download Installation Guide for Floodlights GE V3SL. GE V3SL Installation Guide User Manual

  • Download
  • Add to my manuals
  • Print
  • Page
    / 4
  • Table of contents
  • BOOKMARKS
  • Rated. / 5. Based on customer reviews
Page view 0
READ THOROUGHLY BEFORE INSTALLING
Save instructions for future use.
General:
Fixture access: To open, apply slight downward pressure to the
front of the door frame and pull latch. To close fixture, close door
until latch engages.
Mounting Plate Installations:
Install fixture onto sign structure and securely fasten using the
mounting plate/bracket.
Mounting Plate installation is for uplight only. Please call
manufacturer regarding other mounting options.
CAUTION
Unit will fall if not installed properly
Follow installation instructions
WARNING
Risk of electric shock
Turn power off before servicing
see instructions
GENERAL
This luminaire is designed for use in outdoor applications and
should not be installed in areas of limited ventilation or in high
ambient temperature enclosures. This fixture should be installed
and maintained according to the following recommendations.
UNPACKING
This luminaire has been packed so that no parts should have
been damaged during transit. Inspect to confirm.
INSTALLATION
IMPORTANT: In order to provide a watertight seal, the
installer must seal the area around the knock-out holes, with
a type of caulking compound such as GE 100% silicone.
Slipfitter Installation:
Rout fixture leads through the Arm Fitting (provided by
others) connect to power leads (provided by others). Mount
fixture slipfitter to the Arm Fitting and secure by using (4) set
screws (provided) as illustrated in Figure 1.
If the Fixture is mounted in a position other than the horizon-
tal, use care that the lens door does not abruptly swing down and
injure someone. In order to mount at top of sign to be used as a
downlight, user needs to order fixture as a V3ST which includes
rain shield.
IMPORTANT: In order to comply with established electrical
code, the installer must seal the area around the Fixture Slipfitter
and the Arm Fitting, with a type of caulking compound such as
GE 100% silicone.
WIRING
For electrical connections, refer to wiring diagram on
ballast or HF generator.
Make all electrical connections in accordance with the
National Electrical Code and any applicable local code
requirements.
Verify that supply voltage is correct by comparing it to
nameplate.
GEH-5959C
Versaflood III
INSTRUCTIONS
Figure 1
Fixture Door
and Diffuser
Draw Pull
Latch (2)
Mogul Base
Socket
Socket Set
Screws (2)
Fixture Mounting Bracket
Silicone Sealant
J-Box
Black Wire
Ground Wire
White Wire
Wire Connectors (3)
Arm Fitting
(by others)
These instructions do not purport to cover all details or variations in equipment nor to provide for every possible contingency to be met in connection with installation, operation or
maintenance. Should further information be desired or should particular problems arise which are not covered sufficiently for the purchaser’s purposes, the matter should be referred
to GE Lighting Solutions.
g
GE
Lighting Solutions
Page view 0
1 2 3 4

Summary of Contents

Page 1 - Versaflood III

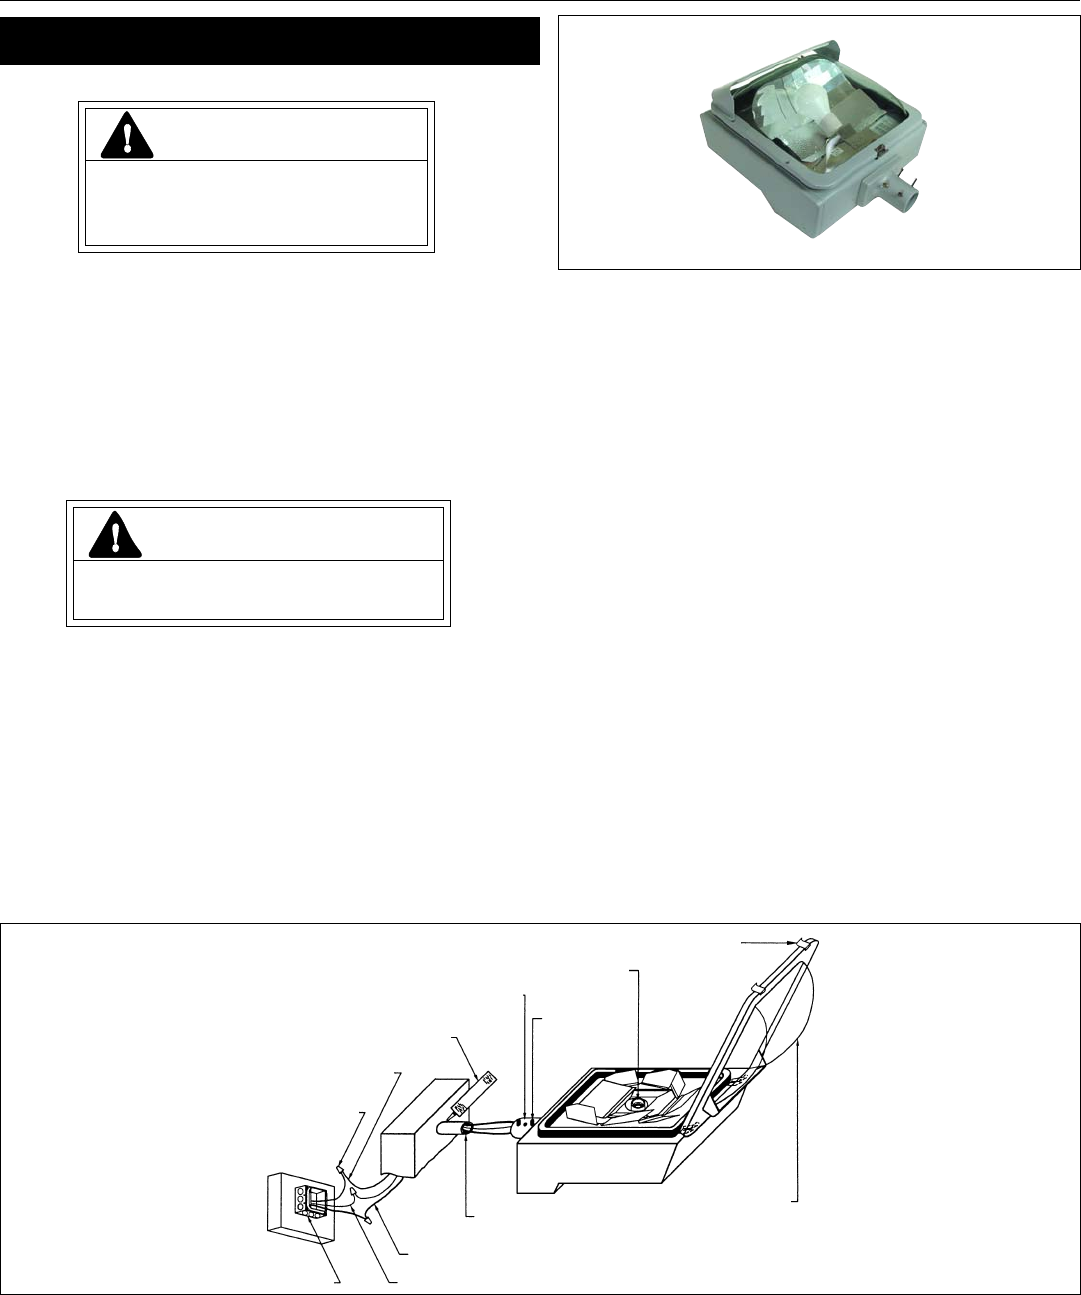
READ THOROUGHLY BEFORE INSTALLINGSave instructions for future use.General:Fixture access: To open, apply slight downward pressure to thefront of the d

Page 2 - LAMP INSTALLATION/REPLACEMENT

Connect ground lead to the green lead, green groundscrew on housing or terminal block provided.Do not remove insulated connectors from wires not neede

Page 3

GEH-5959CVersaflood III ™INSTRUCTIONSLIRE ATTENTIVEMENT AVANT D'INSTALLERConserver ces instructions pour référence future.Généralités :Accès au l

Page 4 - ATTENTION

N'enlevez pas les connecteurs isolés des fils non concernéspar le raccordement de la tension.MONO-TENSION :Tous les ballasts sont précâblés et l&

Comments to this Manuals

No comments